Spring Security SAML
On This Page
This guide describes how to use Spring Security SAML to add support for Okta (via SAML) to Java applications that use the Spring framework. In this guide, you learn how to install and configure an Okta SAML application.
This guide assumes that you are familiar with the basics of Java software development: editing text files, using the command line, and running Tomcat, Maven, or Gradle.
If you're already familiar with Okta and Spring, you can skip to the Configure Spring Security SAML to work with Okta section.
Note: The Spring Security SAML toolkit that you download isn't an Okta toolkit and isn't supported by Okta.
Requirements
Please make sure that the following are installed before starting installation:
Check using the following command:
java -version
Check using the following command:
mvn --version
Installation
This section covers what you need to do to install and configure Tomcat from scratch on Mac OS X. If you already have Tomcat on your system, you can skip to the Download the Spring SAML Extension step.
How to install the Spring Security SAML sample Okta application on Mac OS X:
1. Install Tomcat
If it's not already installed, install Tomcat with Homebrew using these directions.
2. Download the Spring SAML Extension
Use git clone to clone the extention locally:
git clone https://github.com/spring-projects/spring-security-saml.git
3. Download the sample application
Use git clone to clone this repository locally:
git clone https://github.com/nshobayo/okta-SpringSAML.git
Use this command to copy the sample Okta application into the Extension's src folder:
rm -rf spring-security-saml/sample/src/main
cp -r okta-SpringSAML/src/main spring-security-saml/sample/src
4. Compile
Make sure that your working directory is the sample subdirectory of the spring-security-saml directory:
cd spring-security-saml/sample
To compile:
../gradlew build install
This task compiles, tests, and assembles the code into a .war file. A successful build should look something like this: 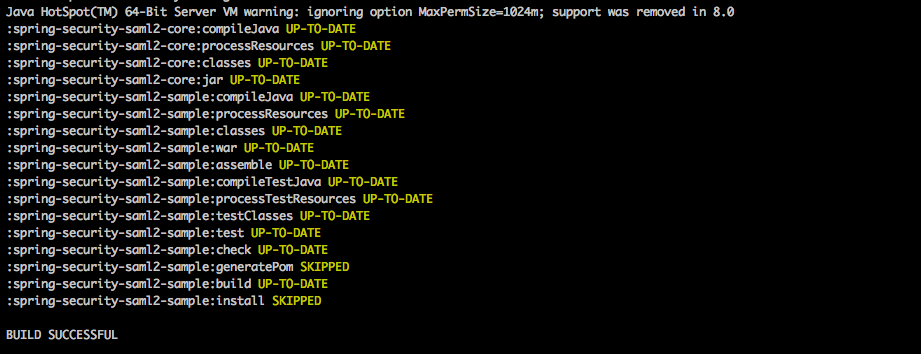
You can find your compiled WAR archive file, spring-security-SAML2-sample.war, in the build/libs/ directory.
5. Deploy
Assuming that your current directory is spring-security-saml/sample, use the following command to copy the compiled spring-security-SAML2-sample.war file to the Tomcat directory that you set up in step one:
cp build/libs/spring-security-SAML2-sample.war /Library/Tomcat/webapps/
6. Start Tomcat
Use the following command to start Tomcat:
/Library/Tomcat/bin/startup.sh
7. Start the Application
Load the Spring SAML application by opening this link: http://localhost:8080/spring-security-saml2-sample/saml/discovery?entityID=http%3A%2F%2Flocalhost%3A8080%2Fspring-security-saml2-sample%2Fsaml%2Fmetadata&returnIDParam=idp
Note: Links in the app aren't functional yet because we haven't configured any IDPs. Full app functionality is completed after the Configure Spring Security SAML to work with Okta section.
Here's what it should look like: 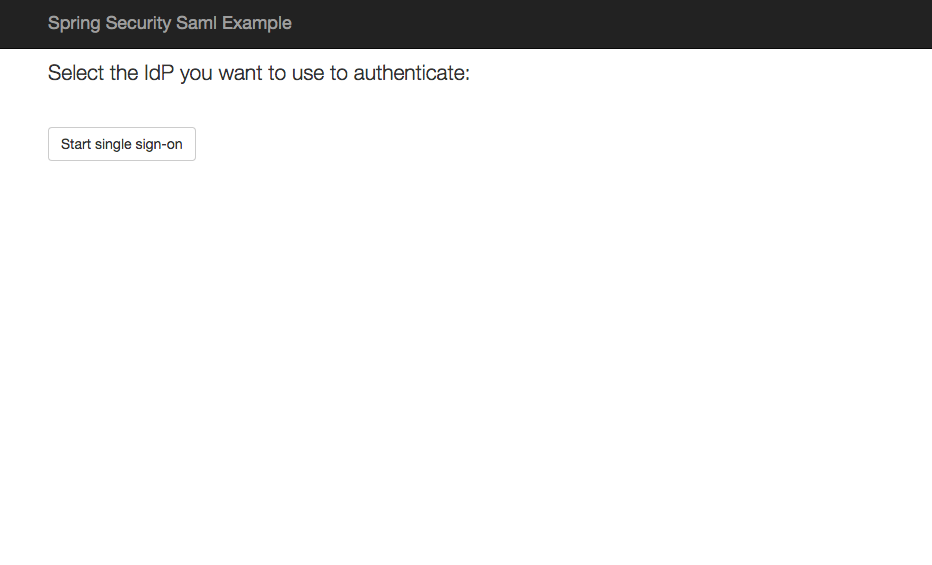
Configure Okta to work with Spring Security SAML
Before we can configure Spring Security SAML, we need to set up an application in Okta that connects to Spring Security SAML.
In SAML terminology, what we are doing here is configuring Okta, which is our SAML Identity Provider (SAML IdP), with the details of Spring Security SAML, which is the new SAML Service Provider (SAML SP) that you create next.
Here is how to configure Okta:
1. Sign in to your Okta organization as a user with administrative privileges. If you don't have an Okta organization, you can create a free Okta Developer Edition organization.
2. Click Admin, and then Add Applications.
3. Click Create New App.
4. In the dialog box that appears, select SAML 2.0, and then click Create. 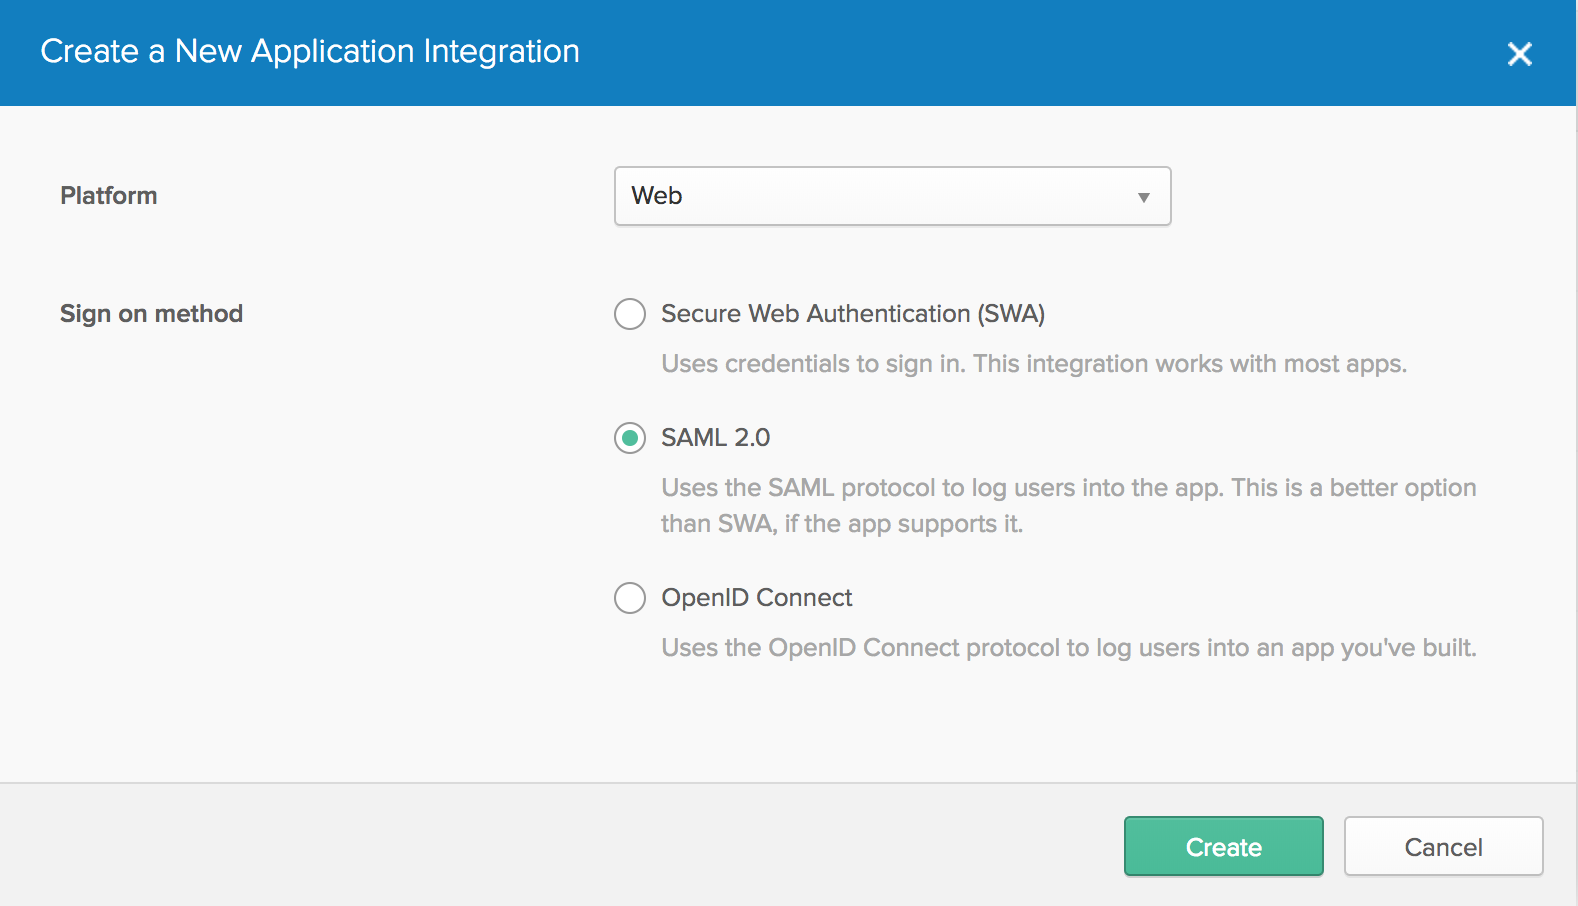
5. In the General Settings section, enter Spring Security SAML in the Appname box, and then click Next. 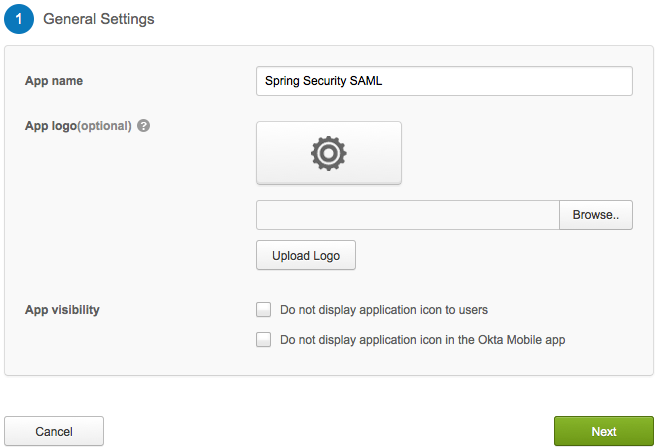
6. In the Configure SAML section, paste the following URL into the Single sign on URL box:
http://localhost:8080/spring-security-saml2-sample/saml/SSO
7. Then paste the following URL into the Audience URI (SP Entity ID) box:
http://localhost:8080/spring-security-saml2-sample/saml/metadata
You can add user attributes sent in each SAML assertion under Attribute Statements during this step, if desired. Theses attribute values can be derived and used from the SP side.
8. Click Next. 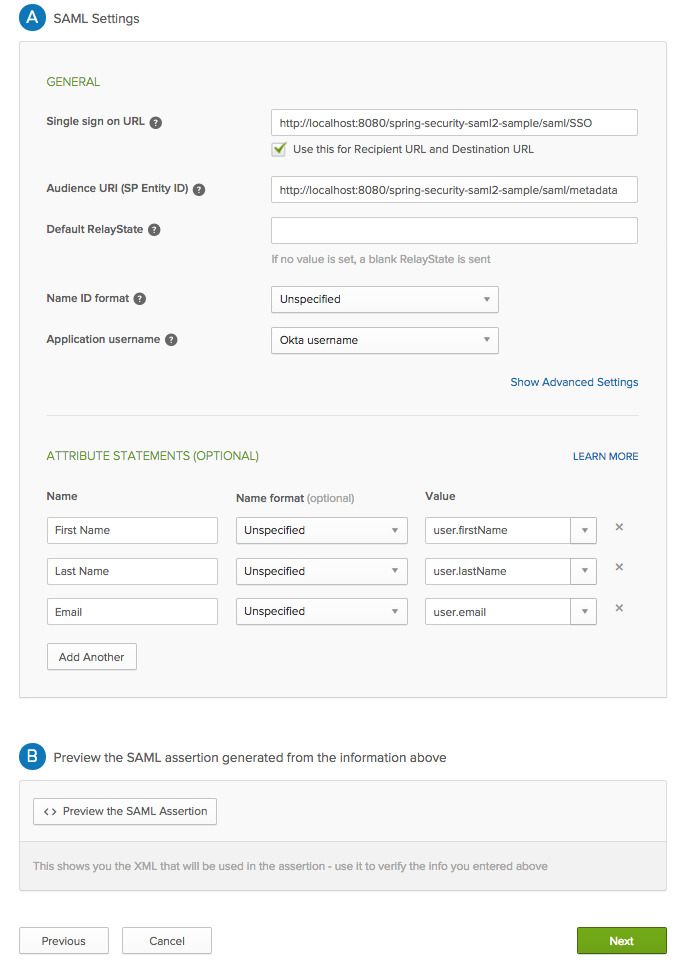
9. In the Feedback section, select the This is an internal application that we created check box and click Finish. 
The **Sign On** section of your newly created Spring Security SAML application appears.
10. Copy the Identity Provider metadata link by right-clicking the Identity Provider metadata link and selecting Copy. You will need this link later. 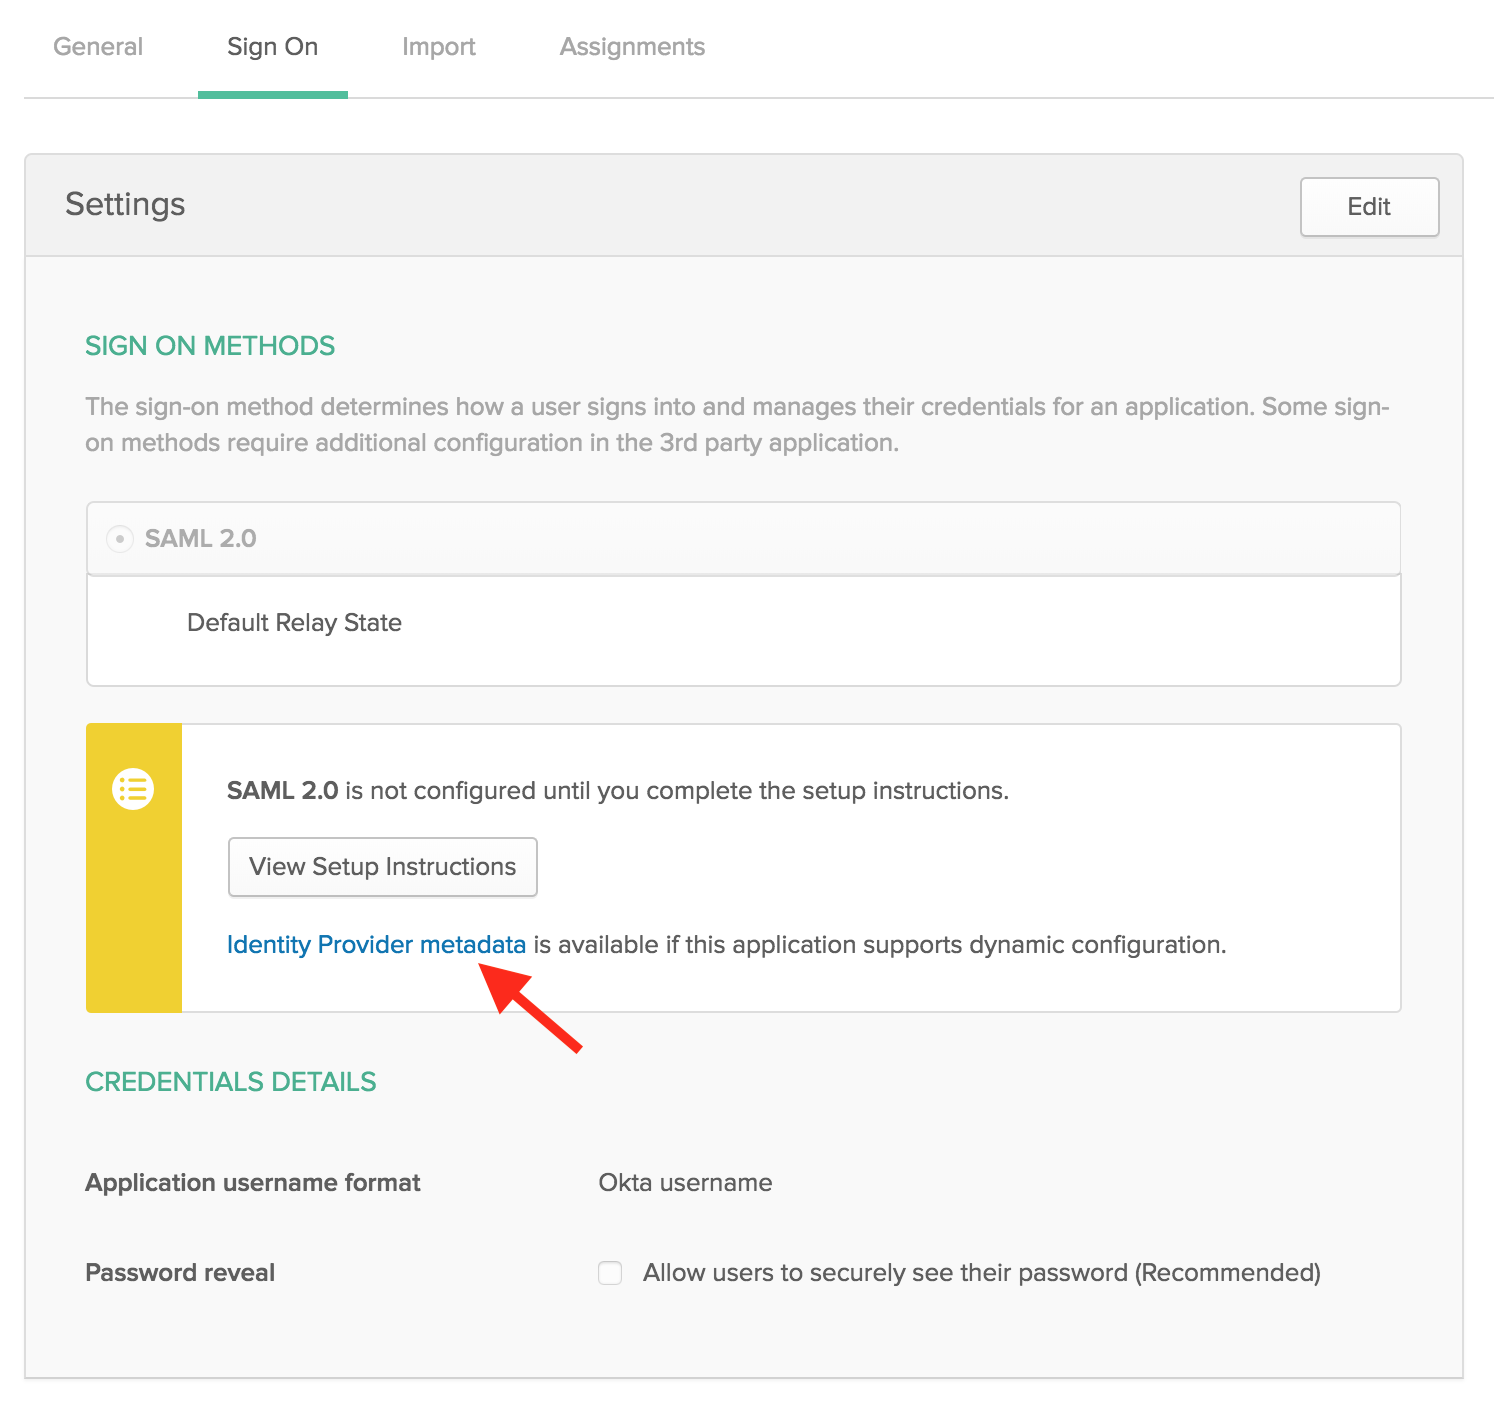
11. Right-click the People section of the Spring Security SAML application and select Open Link In New Tab (so that you can come back to the Sign On section later).
12. In the new tab that opens, click Assign Application. 
13. The Assign Spring Security SAML to up to 500 people dialog box appears. Enter your username into the search box, select the check box next to your username, and then click Next. 
14. You are prompted to enter user-specific attributes. Click Confirm Assignments to keep the defaults. 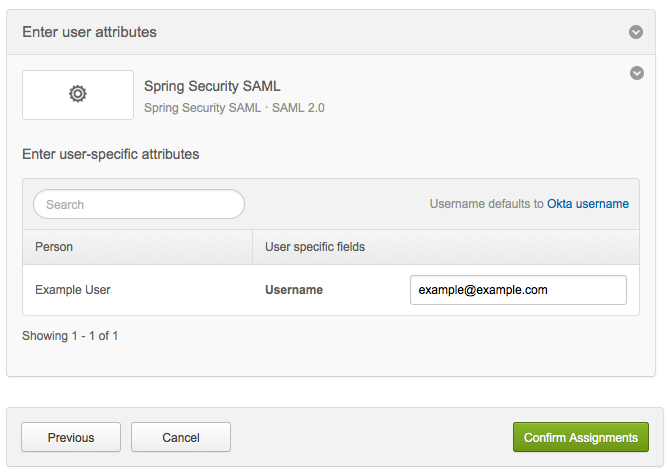
Configure Spring Security SAML to work with Okta
Now that you have configured a Spring Security SAML application, you are ready to configure Spring Security SAML to work with Okta. In this section we use the Identity Provider metadata link that you copied in the last section to configure Spring Security SAML. Once you've completed these steps, you'll have a working example of connecting Okta to Spring.
1. Open the securityContext.xml file in your favorite text editor. If you followed the instructions in the last section for "Installing the Spring Security SAML sample application" on Mac OS X, this file is located at /Library/Tomcat/webapps/spring-security-saml2-sample/WEB-INF/securityContext.xml. (Normally, you would do this step before running Maven or Gradle to create the WAR file that you deploy to Tomcat. In this case, I'm having you edit the file in the Tomcat path directly, since it's easier to make small changes and test them this way).
2. Once you've opened the securityContext.xml file, add the following XML to the end of the tag identified by this CSS selector syntax:
#metadata > constructor-arg > list
	<bean class="org.opensaml.saml2.metadata.provider.HTTPMetadataProvider">
	  <!-- URL containing the metadata -->
	  <constructor-arg>
		<!-- This URL should look something like this: https://${yourOktaDomain}/app/abc0defghijK1lmN23o4/sso/saml/metadata -->
		<value type="java.lang.String">{metadata-url}</value>
	  </constructor-arg>
	  <!-- Timeout for metadata loading in ms -->
	  <constructor-arg>
		<value type="int">5000</value>
	  </constructor-arg>
	  <property name="parserPool" ref="parserPool"/>
	</bean>
3. Make sure to replace the contents of {metdata-url} with the link that you copied in step 11 of the Configure Okta to work with Spring Security SAML section.
4. Save the securityContext.xml file, then restart Tomcat. If you are using Mac OS X, you can restart Tomcat using the following commands:
	/Library/Tomcat/bin/shutdown.sh
	/Library/Tomcat/bin/startup.sh
Test the SAML integration
Now that you've set up an application in Okta and configured the Spring Security SAML example application to use that application, you're ready to test it out.
There are two ways to test a SAML application: Starting from the Spring application ("SP initiated") and starting from Okta ("IdP initiated").
You will be testing both methods. In both cases, you will know if the test worked when you see a screen that looks like the following: 
1. Sign in from the Spring Security SAML sample application (This is known as an "SP initiated" sign in).
-Open the sample application in your browser:
http://localhost:8080/spring-security-saml2-sample
-Select the Okta IdP from the list. It is a URL that starts with: http://www.okta.com/.
-Click Start single sign-on. 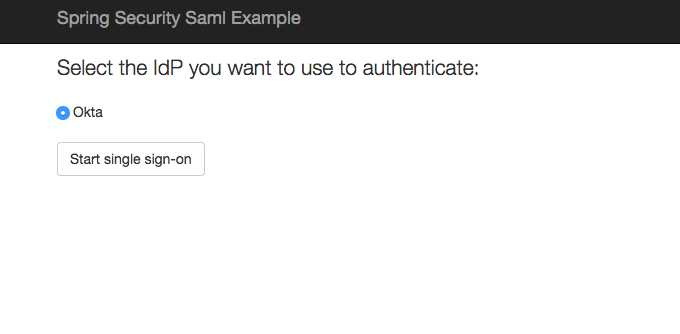
2. Sign in from Okta (This is known as an "IdP initiated" sign in).
-Sign in to your Okta organization.
-Click the button for the application that you created in the Configure Okta to work with Spring Security SAML section. 
If you're able to access the Authenticated User page using both of these methods, then you're done. Congratulations on getting Okta working with Spring!
Next Steps
At this point, you should be familiar with setting up SAML-enabled applications to work with an Okta organization and how to configure Spring Security SAML to work with Okta.
After you have Okta working with the example Spring Security SAML application, the next step is to take the example code and move it to your production application. The specifics of how this works is different depending on how your application is set up. Pay special attention to the securityContext.xml, which allows you to add more IDPs to the app as well as control page redirects. Before any changes are made to the securityContext.xml file, you should consider reading the Spring Security SAML reference documents that provide a detailed overview of all the components and features of Spring Security SAML.
If you want to learn more about configuring SAML and what to consider when writing a SAML application, see the in-depth Okta SAML guidance documentation, which is great place to learn more.